Azure — Add Enterprise Application, Create your own application.
Azure — Add Enterprise Application, Create your own application.
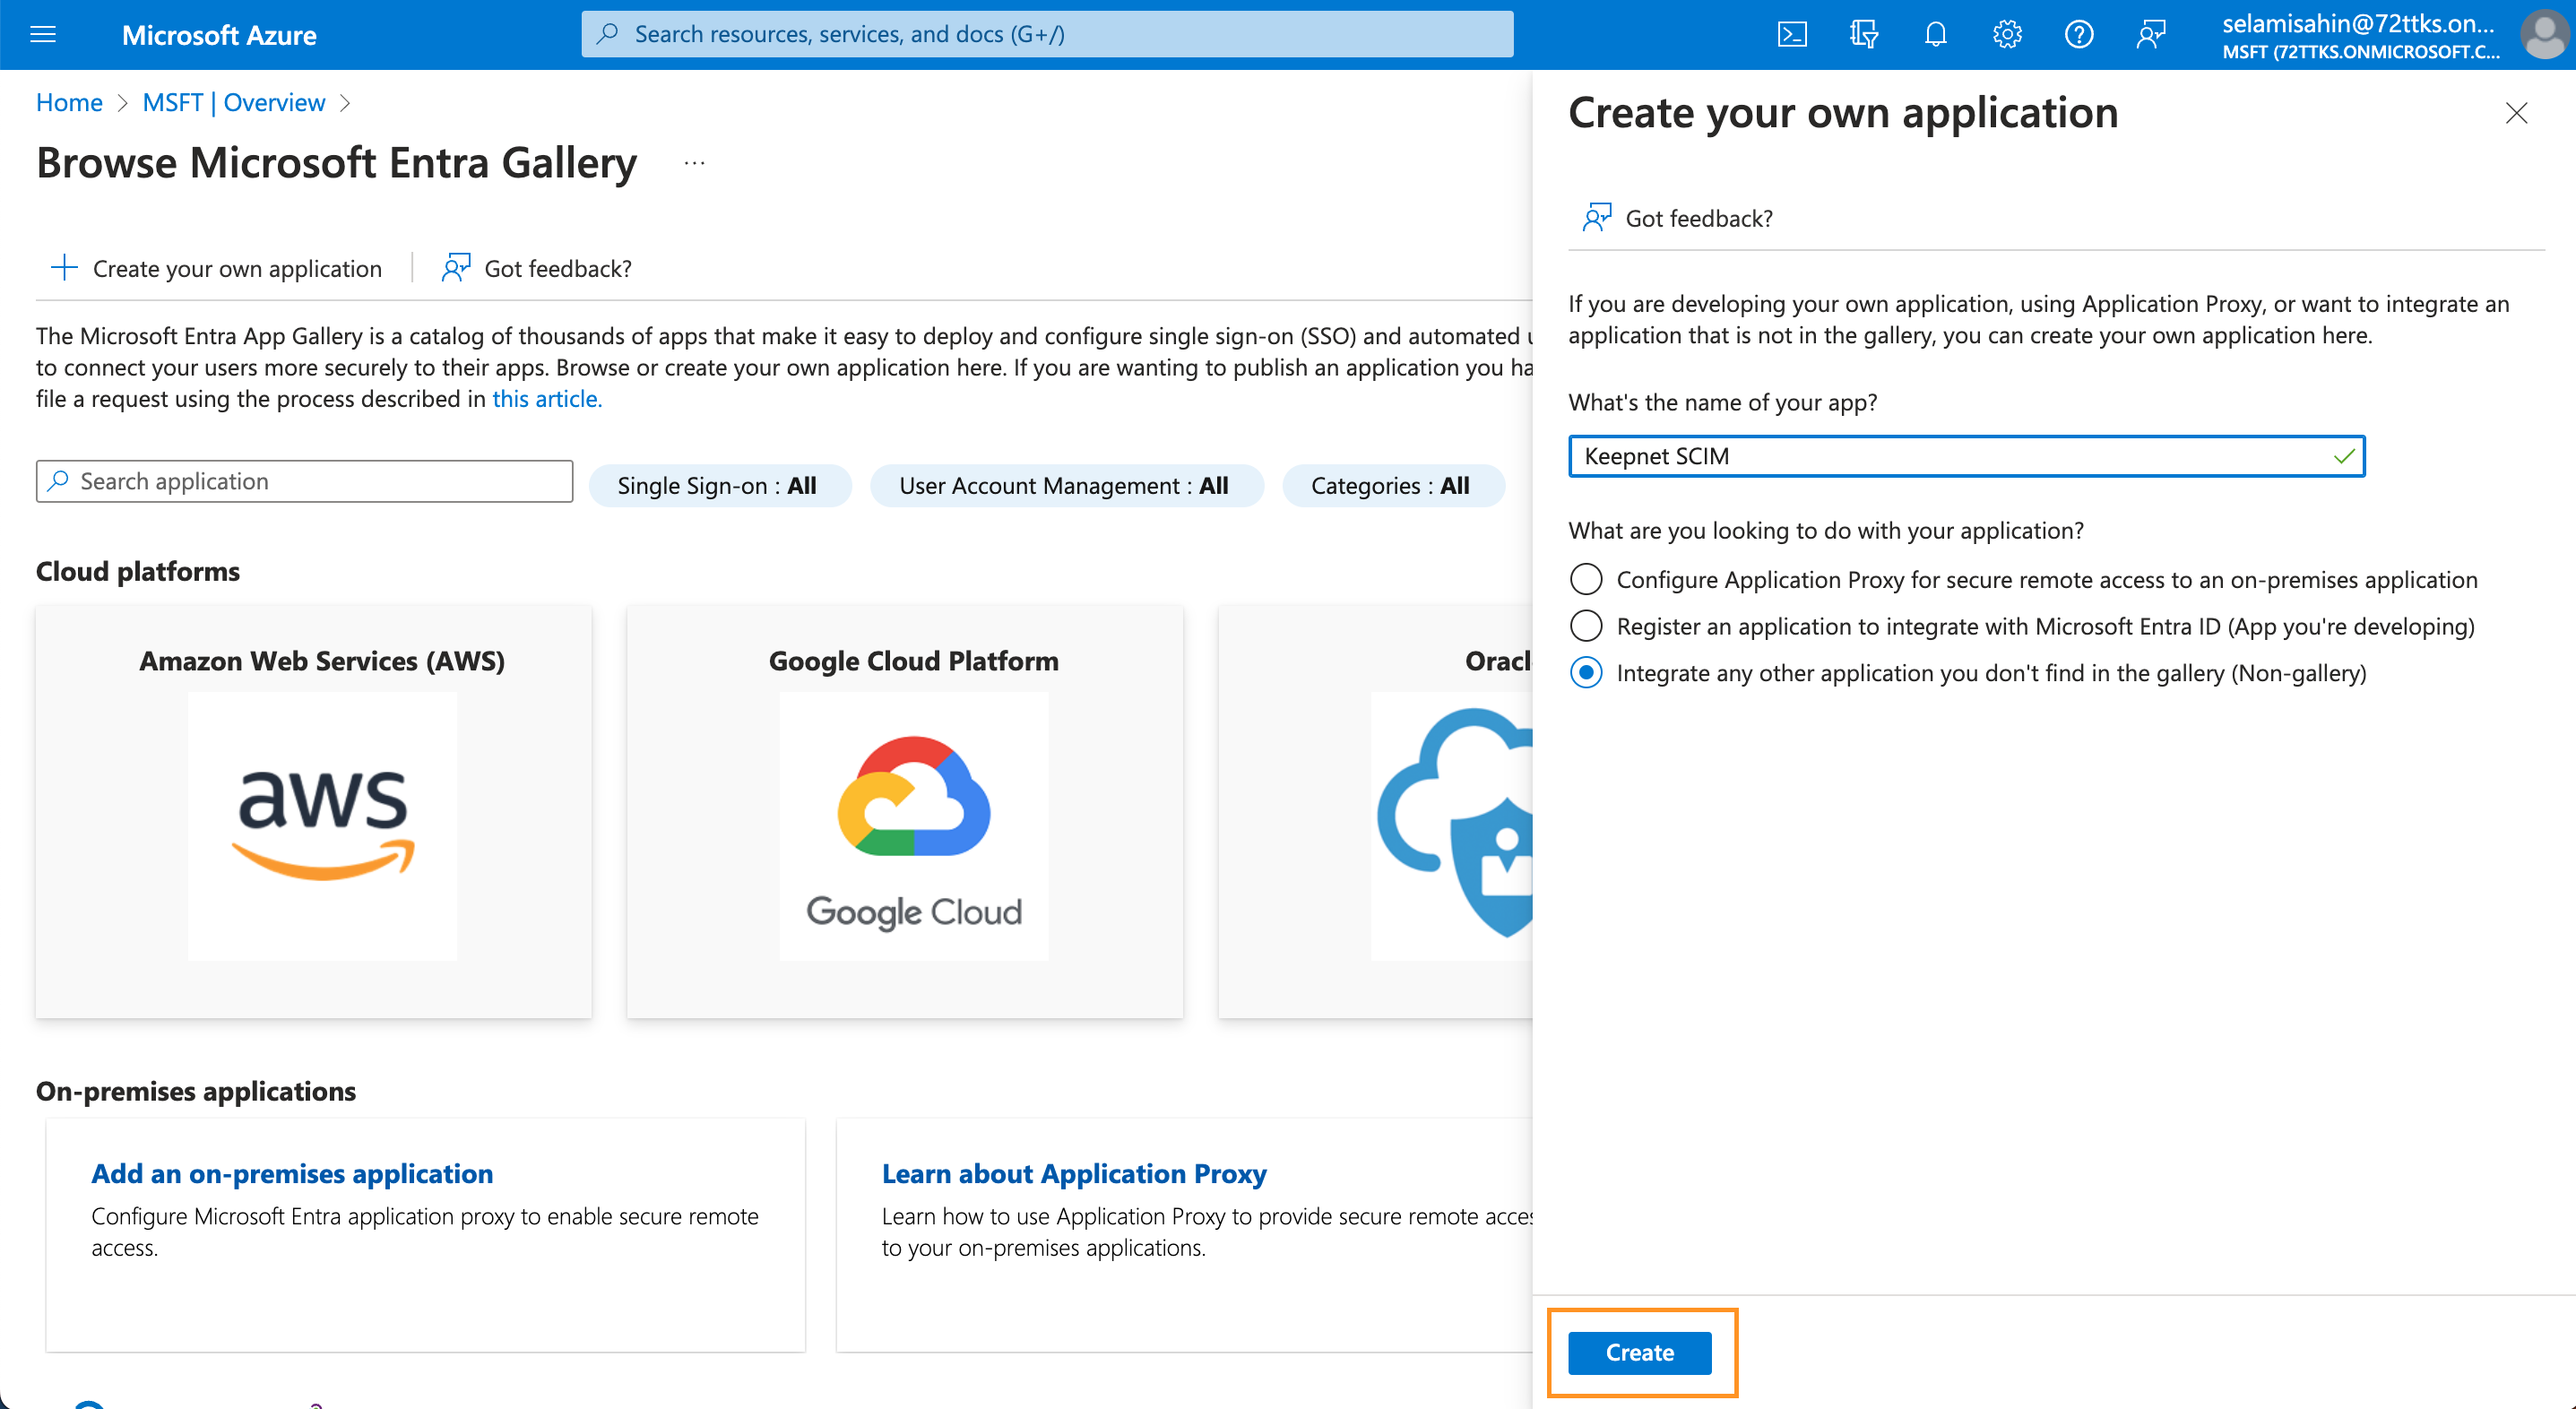
Create your own application — name and Non-gallery option.
Provisioning settings — Tenant URL, Secret Token, Test Connection.
Users and groups — Add users/groups, assign groups for SCIM sync.